
The Hidden Structural RisksBehind a Wall
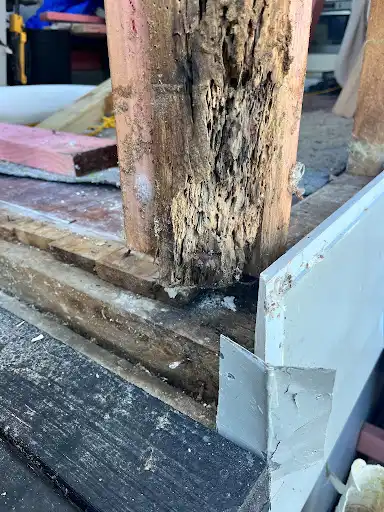
During a project on a small 1940s cottage, the team uncovered a severe structural issue that was entirely invisible from inside the home. The wall appeared completely straight and solid from the interior, yet the primary timber post supporting the corner of the roof had completely rotted away at its base.
During a previous renovation, a past contractor had installed fresh, pink boron, treated framing around the original post. Whether that work was completed with good intentions to provide secondary support or simply to avoid the effort of replacing the damaged timber, the result was dangerous. The new pink timber did not resolve the decay underneath, it simply concealed the problem and created a false sense of security.
This experience highlights a critical reality in residential construction. Not every renovation is executed to appropriate standards, which is why homeowners should work with a licensed, trusted builder who will identify and rectify structural defects rather than hide them behind new wall linings.
The Rot Found Behind the Framing
When evaluating a building envelope from the interior, wall linings can easily mask significant structural deterioration behind the plasterboard. In the case of this cottage, removing the exterior cladding revealed that the bottom section of the corner post had fully decomposed due to historical moisture ingress.
The presence of newer pink framing surrounding the decayed post made the assembly appear modern and well-maintained to a casual observer. However, because the original rotted timber remained trapped within the wall cavity, moisture continued to accumulate, compromising the load-bearing capacity of the corner framing.
This situation demonstrates how previous cosmetic or partial repairs can mask active structural risks. A building assembly requires a comprehensive structural assessment whenever wall cavities are opened during construction.
Understanding Framing Timber Treatment and Performance
A review of New Zealand building history provides important context regarding structural timber vulnerabilities. For many decades, framing timber in New Zealand was treated with boron salts to protect the wood against insect attack and fungal decay. In 1995, revisions to national building standards permitted the use of untreated kiln-dried radiata pine framing, provided the timber remained dry throughout its service life (NZS 3602:1995).
Following these regulatory changes, a substantial proportion of New Zealand homes constructed between 1998 and April 2004 were built using untreated timber framing. When moisture penetrates the cladding of homes built during this era, untreated radiata pine decays rapidly. Building science research from the Building Research Association of New Zealand (BRANZ) identifies this untreated timber era as a significant contributor to the nationwide leaky building crisis.
Pink timber shows that the framing was chemically treated at the saw mill, but this does not make it waterproof. Treatment helps protect against insects and some types of decay, but timber can still deteriorate if it stays wet for long periods.
So while pink framing indicates treated timber was used, it does not guarantee that the timber has remained sound after exposure to leaks, trapped moisture, or poor installation.
How We Remediated the Issue
A corner post carries substantial vertical gravity loads from the roof assembly while providing crucial lateral bracing for the overall structure. Under New Zealand Building Code Clause B1 (Structure), residential buildings must withstand localised wind loads and seismic activity. Because Waiheke Island sits in a high wind zone and New Zealand experiences regular seismic events, a structural failure at a building corner compromises the structural integrity of the entire building envelope during a severe weather or earthquake event.
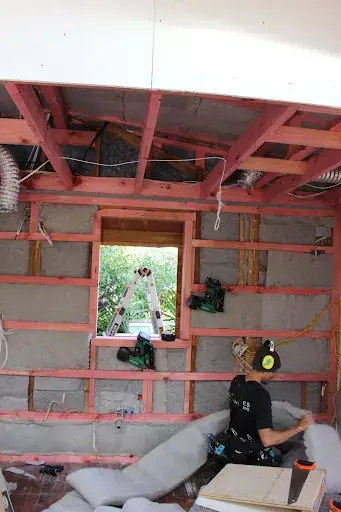
Remediating this corner required a methodical, compliant structural repair process:
- Temporarily propped and supported the roof load.
- Removed the decayed timber stud entirely from the assembly.
- Installed new, properly treated structural timber framing.
- Re-installed structural bracing to meet lateral resistance requirements.
- Conducted a thorough quality assurance check prior to closing the wall cavity.
- Installed a continuous, high-performance vapour-permeable building wrap with fully taped joints.
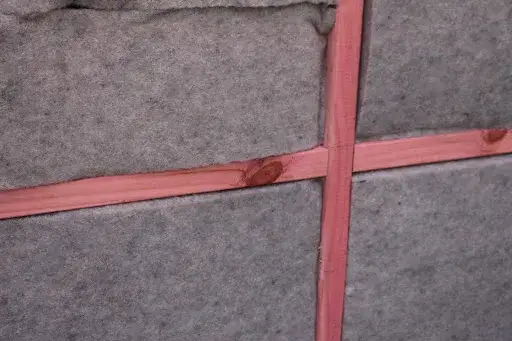
- Added wall cavity insulation to meet current thermal performance standards.
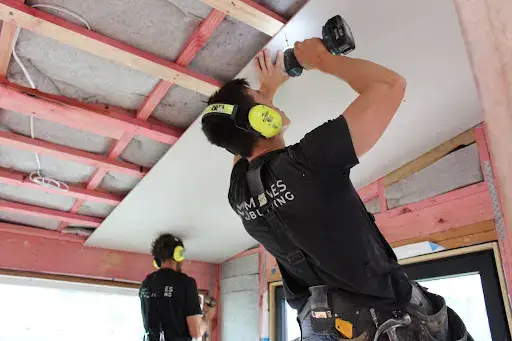
Completing these steps ensured that the wall assembly achieved full structural compliance and weather tightness before the new exterior cladding was installed.
Why Doing the Harder Thing Is Often the Right Thing
When undertaking building maintenance or alterations, options often exist to complete work entirely from the interior without removing exterior cladding. While working from the inside can reduce immediate construction costs and timeline risks, it limits visibility into the condition of the outer framing, bottom plates, and historical building wraps.
Opting to strip exterior cladding during a major renovation requires additional time, expenditure, and weather management planning. However, removing cladding provides the only definitive method for inspecting structural timber, identifying hidden decay, and establishing a continuous, modern weather barrier around the building envelope.
Choosing thorough remediation over cosmetic concealment ensures that structural defects are permanently resolved rather than left to deteriorate silently behind new finishes.
Helpful Tips for Your Next Renovation
Homeowners planning a major renovation should consider the following practical guidance:
- Investigate the construction era: Buildings constructed or altered between 1998 and 2004 carry a higher statistical risk of containing untreated framing timber. Land Information Memorandum (LIM) reports and historic council consent records provide valuable verification.
- Evaluate cladding removal scope: Discuss with the project team whether cladding will be removed. If interior-only work is proposed, request a clear explanation regarding how framing integrity and weather tightness will be assessed.
- Verify inspection methodology: Inquire how existing framing will be evaluated. Visual checks alone are insufficient; moisture meter testing and deep timber probing provide significantly higher diagnostic accuracy.
- Critique past alterations: Treat previous renovations as areas requiring verification rather than assuming the work was completed correctly. Newer framing may conceal original structural issues.
- Establish contingency plans early: Clarify with the builder how structural defects or hidden rot will be handled before signing construction contracts.
- Focus on high-risk junctions: Ensure special attention is given to building corners, bottom wall plates, window joinery openings, and ground-clearance zones where water accumulation is most common.
Summary
A building can display pristine interior finishes while structural load-bearing members within the wall cavity suffer from advanced decay. Renovations offer a rare opportunity to inspect the internal structure of a home, an opportunity that typically arises only once in a generation. Utilising this opportunity to thoroughly inspect, repair, and correctly seal the building envelope ensures long-term structural safety and durability.
A Useful Place to Begin

Frequently Asked Questions
References
- BRANZ. Timber treatment standards and decay risks in New Zealand homes. Technical Bulletin.
- BRANZ. Weathertightness and structural timber decay. Build Magazine.
- Ministry of Business, Innovation and Employment (MBIE). New Zealand Building Code Clause B1 Structure.
- Ministry of Business, Innovation and Employment (MBIE). New Zealand Building Code Clause E2 External Moisture.
- Standards New Zealand. (1995). NZS 3602:1995 Timber and wood-based products for use in building.